Introduction 00:00
This lesson is called “mouse events” in order to make things clear, but it actually deals with “pointer events” in general since what we are going to see will also work with touch screens.
For practical reasons, we are only going to demonstrate using a mouse (or trackpad), but feel free to test this lesson on your phone or whatever device you have access to.
Setup 00:27
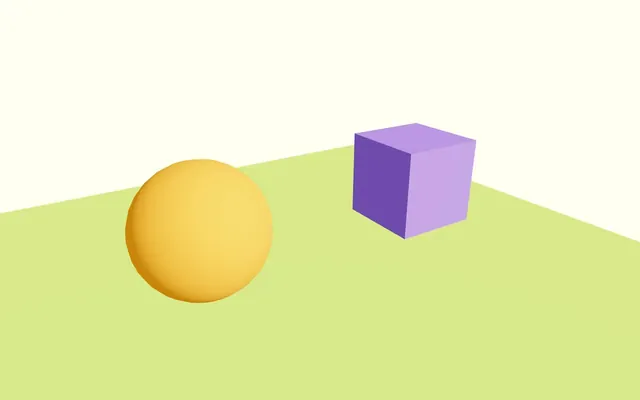
In the starter, we have an orange sphere, an animated purple cube and a green floor.
The @react-three/drei dependency is already installed within the project and we are using the OrbitControls helper to be able to move the camera around.
We haven’t used Perf since we shouldn’t have any performance concerns, but feel free to add it if you want.
Listening to click events 00:44
As discussed in the previous lessons, handling mouse events was a bit tricky. We needed a Raycaster, cast some rays (sometimes on each frame) and tested intersecting objects that we had to put in arrays, etc.
R3F has made that process much easier and we won’t even have to implement a Raycaster.
Let’s start by listening to a click event.
All we need to do is add a onClick attribute to an object in our scene (like a <mesh>) and provide it with a function.
We can send a function directly, or we can create it before.
In Experience.jsx, create a eventHandler function before:
export default function Experience()
{
    // ...

    const eventHandler = () =>
    {
        console.log('the event occured')
    }

    // ...
}
We’ve chosen a generic name for the function (eventHandler) since we are going to use it to test other events. But for real projects, remember to name your function with something that makes sense like cubeClickHandler.
Now add the onClick attribute to the purple box <mesh> and send it the eventHandler:
<mesh ref={ cube } position-x={ 2 } scale={ 1.5 } onClick={ eventHandler } >
    <boxGeometry />
    <meshStandardMaterial color="mediumpurple"/>
</mesh>
And we are done! I’ll see you in the next lesson.
Just kidding, as we have a bunch of features to discover, but as you can see, it’s super easy.
To have some visual feedback, let’s change the color of the box when we click on it. We already have a cube reference and we can change its material.color with a random HSL color:
const eventHandler = () =>
{
    cube.current.material.color.set(`hsl(${Math.random() * 360}, 100%, 75%)`)
}
You can also test this feature on mobile by tapping on the cube.
Event information 06:36
We can access event-related information by adding an argument to the function. We can call it event (or just e):
const eventHandler = (event) =>
{
    console.log(event)
    cube.current.material.color.set(`hsl(${Math.random() * 360}, 100%, 75%)`)
}
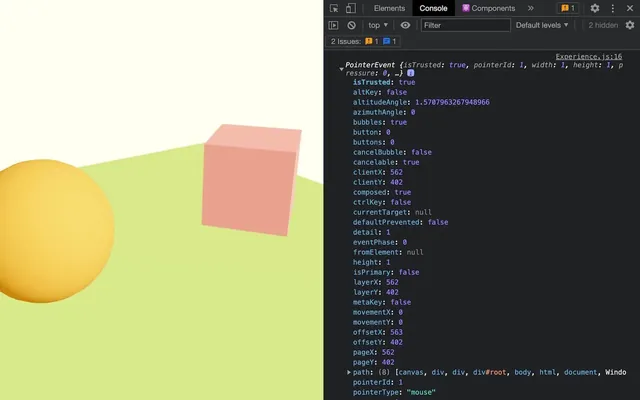
event is an object that contains many properties and methods.
Here are some of them:
console.log('---')
console.log('distance', event.distance) // Distance between camera and hit point
console.log('point', event.point) // Hit point coordinates (in 3D)
console.log('uv', event.uv) // UV coordinates on the geometry (in 2D)
console.log('object', event.object) // The object that triggered the event
console.log('eventObject', event.eventObject) // The object that was listening to the event (useful where there is objects in objects)

console.log('---')
console.log('x', event.x) // 2D screen coordinates of the pointer
console.log('y', event.y) // 2D screen coordinates of the pointer

console.log('---')
console.log('shiftKey', event.shiftKey) // If the SHIFT key was pressed
console.log('ctrlKey', event.ctrlKey) // If the CTRL key was pressed
console.log('metaKey', event.metaKey) // If the COMMAND key was pressed
As you can see, it’s a mix of native JavaScript event information and R3F-related event information.
The click event might sound like the simplest one, but it’s more complex than it seems.
A click implies that the pointer went down onto the object and then up again while remaining on the object. If it started outside or ended outside, the event doesn’t count as a click.
But we don’t have to worry about any of that since it’s handled by R3F.
Other events 11:02
onClick is just one of the many events we can listen to.
Even though most of them are obvious, we are going to test them to ensure we understand how they work and when they are triggered.
You can replace the onClick attribute with the following attributes.
onContextMenu
onContextMenu is triggered when the context menu should appear.
On a desktop, we can show the context menu by inputting a RIGHT CLICK or CTRL + LEFT CLICK.
On a mobile device, we can display that menu by pressing down for some time.
onDoubleClick
onDoubleClick is triggered when we double click/tap on the same object.
The delay between the first and second click/tap is defined by the OS.
onPointerUp
onPointerUp is triggered when we release the click (left or right) or touch.
onPointerDown
onPointerDown is triggered when we’ve just clicked or put our finger down.
onPointerOver and onPointerEnter
onPointerOver and onPointerEnter work exactly the same way.
The event is triggered when the cursor or finger just went above the object.
In native JavaScript, the mouseover event is slightly different than the mouseenter because it keeps triggering the event while the cursor enters children of the element being tested.
(we will talk about elements inside elements in R3F later).
onPointerOut and onPointerLeave
onPointerOut and onPointerLeave work exactly the same way.
The event is triggered when the cursor or finger just went out from the object.
onPointerMove
onPointerMove is triggered with each frame if the cursor has moved since the last frame, while above the object.
onPointerMissed
onPointerMissed will let you know if the user clicks outside of the object.
But onPointerMissed is a bit special since we can add it on the <Canvas> and it will be triggered if we click (when the click is released) but none of the listen objects have registered a hit:
<Canvas
    camera={ {
        fov: 45,
        near: 0.1,
        far: 50,
        position: [ - 4, 3, 6 ]
    } }
    onPointerMissed={ () => { console.log('You missed!') } }
>
    <Experience />
</Canvas>
What to use them for
Choosing between all those events is up to you and what you want to build.
But let’s take an RTS game as an example (Age of Empire or StarCraft):
- When the player clicks on a unit, you want to select it.
- When the user drags and drops, you want to draw a rectangle and when it releases you want to select all units inside the rectangle.
- When the user clicks again but with the shift key, you want to add to the currently selected units or remove them if they were already selected.
- When the user clicks but there is no hit, you want to deselect every unit.
You’ll know when to use which one, but always try to make it feel natural and intuitive for the user.
Occluding 22:45
Change the event attribute on the cube back to onClick.
If you move the camera so that the sphere occludes the cube and click where the cube is supposed to be, you’ll see that the event was registered. By default, the Raycaster doesn’t care about what’s in front of the object being tested:
To do that, we are going to listen to the onClick event on the sphere too and tell it to stop propagating the event.
When we click, Three.js and R3F will order all objects which intersect by distance to the camera (from the closest to the furthest).
If one of the intersecting objects asks to stop the propagation, the next objects won’t trigger the event.
Add the onClick event to the sphere and send it a function:
<mesh position-x={ - 2 } onClick={ () => {} }>
    {/* ... */}
</mesh>
Retrieve the event argument and call its stopPropagation method:
<mesh position-x={ - 2 } onClick={ (event) => event.stopPropagation() }>
    {/* ... */}
</mesh>
The sphere now occludes the cube and we can’t click through it.
Cursor 27:24
On a desktop, one of the best solutions to ensure a user understands that an object is clickable, is to transform the cursor into a finger cursor (similar to when we hover over links).
First, we need to know when the mouse enters the cube and when it leaves the cube.
Add a onPointerEnter and a onPointerLeave attributes to the cube <mesh> and send them empty functions:
<mesh
    ref={ cube }
    position-x={ 2 }
    scale={ 1.5 }
    onClick={ eventHandler }
    onPointerEnter={ () => {  } }
    onPointerLeave={ () => {  } }
>
    <boxGeometry />
    <meshStandardMaterial color="mediumpurple"/>
</mesh>
Then, we can change the style of the cursor directly on one of the top elements like the <body> (which we can access with document.body):
<mesh
    ref={ cube }
    position-x={ 2 }
    scale={ 1.5 }
    onClick={ eventHandler }
    onPointerEnter={ () => { document.body.style.cursor = 'pointer' } }
    onPointerLeave={ () => { document.body.style.cursor = 'default' } }
>
    <boxGeometry />
    <meshStandardMaterial color="mediumpurple"/>
</mesh>'pointer'will look like the finger pointing.'default'will look like the default pointer, which is usually the arrow.
But if you test while the sphere is occulting the cube, it doesn’t work.
To fix that, in addition to the stopPropagation we added to the onClick of the sphere, we must do the same with the onPointerEnter:
<mesh
    position-x={ - 2 }
    onClick={ (event) => event.stopPropagation() }
    onPointerEnter={ (event) => event.stopPropagation() }
>
    <sphereGeometry />
    <meshStandardMaterial color="orange" />
</mesh>
And now the sphere is occluding the cube even for the cursor change effect.
With a helper
There is also a drei helper called useCursor, but it does almost exactly what we did here, which is why we are not going to implement it.
Events on complex objects 32:32
But what happens when we test the click on something composed of multiple objects?
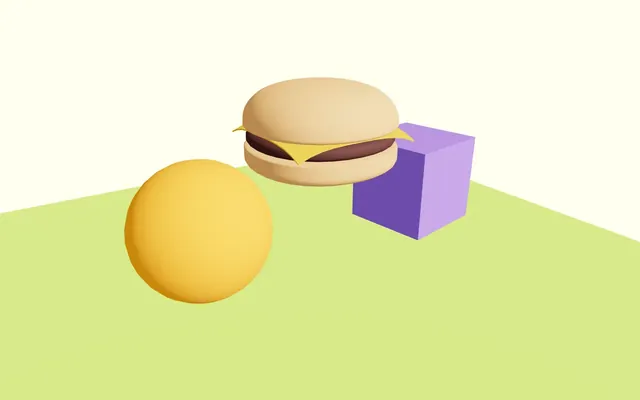
Let’s test it on our hamburger.
We are going to load the hamburger model located in /public/hamburger.glb. Now would be a good opportunity to try it yourself.
Import useGLTF from @react-three/drei:
import { useGLTF, OrbitControls } from '@react-three/drei'Use it to load the model:
export default function Experience()
{
    // ...

    const hamburger = useGLTF('./hamburger.glb')

    // ...
}
Then, add it to the scene with a <primitive>:
export default function Experience()
{
    // ...

    return <>

        {/* ... */}

        <primitive
            object={ hamburger.scene }
            scale={ 0.25 }
            position-y={ 0.5 }
        />

    </>
}
Since the <primitive> is a simple placeholder of the actual object, we can listen to events on it as if it were any other object.
Listen to the onClick event:
<primitive
    object={ hamburger.scene }
    scale={ 0.25 }
    position-y={ 0.5 }
    onClick={ (event) =>
    {
        console.log('click')
    } }
/>
Now try clicking at different parts of the burger:
It seems to be working, but we get up to 4 console.log for each click.
It’s because the ray is going through multiple objects at once.
Even though we listen to the event on the parent, R3F will actually test the children and for good reason, since the parent is nothing without its children (we are getting emotional here).
We can actually test which objects are triggering it with the object property of the event:
<primitive
    object={ hamburger.scene }
    scale={ 0.25 }
    position-y={ 0.5 }
    onClick={ (event) =>
    {
        console.log(event.object)
    } }
/>
Fortunately, we already know the solution.
We need to stop the propagation by calling the stopPropagation method on event:
<primitive
    object={ hamburger.scene }
    scale={ 0.25 }
    position-y={ 0.5 }
    onClick={ (event) =>
    {
        console.log(event.object)
        event.stopPropagation()
    } }
/>
The first object that will trigger the event (whatever it is) will prevent the other ones behind that first object from triggering another event.
Performances 41:20
While listening to pointer events has become super convenient and R3F will optimise the process as best as it can, don’t forget that it’s quite a taxing task for the CPU.
That doesn’t mean you should avoid using events to improve the interactivity of your experiences. Simply keep an eye on performance (especially on low-end devices) and optimise as you can.
General optimisations
Avoid events that need to be tested on each frame if possible: onPointerOver, onPointerEnter, onPointerOut, onPointerLeave, onPointerMove
Try to minimise the number of objects that listen to events and avoid testing complex geometries. If you notice a freeze, even a short one when interacting, you’ll have some more optimisation to do.
meshBounds
One easy optimisation we can apply is the meshBounds helper from drei.
This helper will create a theoretical sphere around the mesh (called bounding sphere) and the pointer events will be tested on that sphere instead of testing the geometry of the mesh.
This is useful if you don’t need a very precise detection on a complex geometry.
We are going to test it on the cube. Be aware that meshBounds only works on single meshes which is why we can’t use it on the hamburger since it’s composed of multiple meshes.
Import meshBounds from @react-three/drei:
import { meshBounds, useGLTF, OrbitControls } from '@react-three/drei'Send it to the cube <mesh> using the raycast attribute:
<mesh
    ref={ cube }
    raycast={ meshBounds }
    position-x={ 2 }
    scale={ 1.5 }
    onClick={ eventHandler }
    onPointerEnter={ () => { document.body.style.cursor = 'pointer' } }
    onPointerLeave={ () => { document.body.style.cursor = 'default' } }
>
    {/* ... */}
</mesh>
The clickable area seems to be a disc matching the cube roughly.
BVH
If you have very complex geometries and still need the pointer events to be accurate an performant, you can also use the BVH (Bounding Volume Hierarchy).
It’s a much more complex approach, but made easy with the Bvh helper from drei.
Because the <Bvh> helper needs to wrap the whole experience, we are going to add it in index.jsx.
In index.jsx, import Bvh from @react-three/drei
import { Bvh } from '@react-three/drei'Wrap the <Experience /> in <Bvh>:
root.render(
    <Canvas
        camera={ {
            fov: 45,
            near: 0.1,
            far: 200,
            position: [ - 4, 3, 6 ]
        } }
        onPointerMissed={ () => { console.log('You missed!') } }
    >
        <Bvh>
            <Experience />
        </Bvh>
    </Canvas>
)
And that’s all it takes for an immediate performance boost when raycasting which is the case for every pointer event we’ve been talking about.
The only downside is that it needs to generate a boundsTree which will then be used internally by Bvh. This process needs to be done only once for each Mesh but can result in a short freeze according to the geometries complexity.